How to Sew a Button by Hand: A Step-by-Step Guide
A practical, step-by-step tutorial for securing flat and shank buttons by hand, creating an appropriate thread stem, and reinforcing stressed garment fabrics.
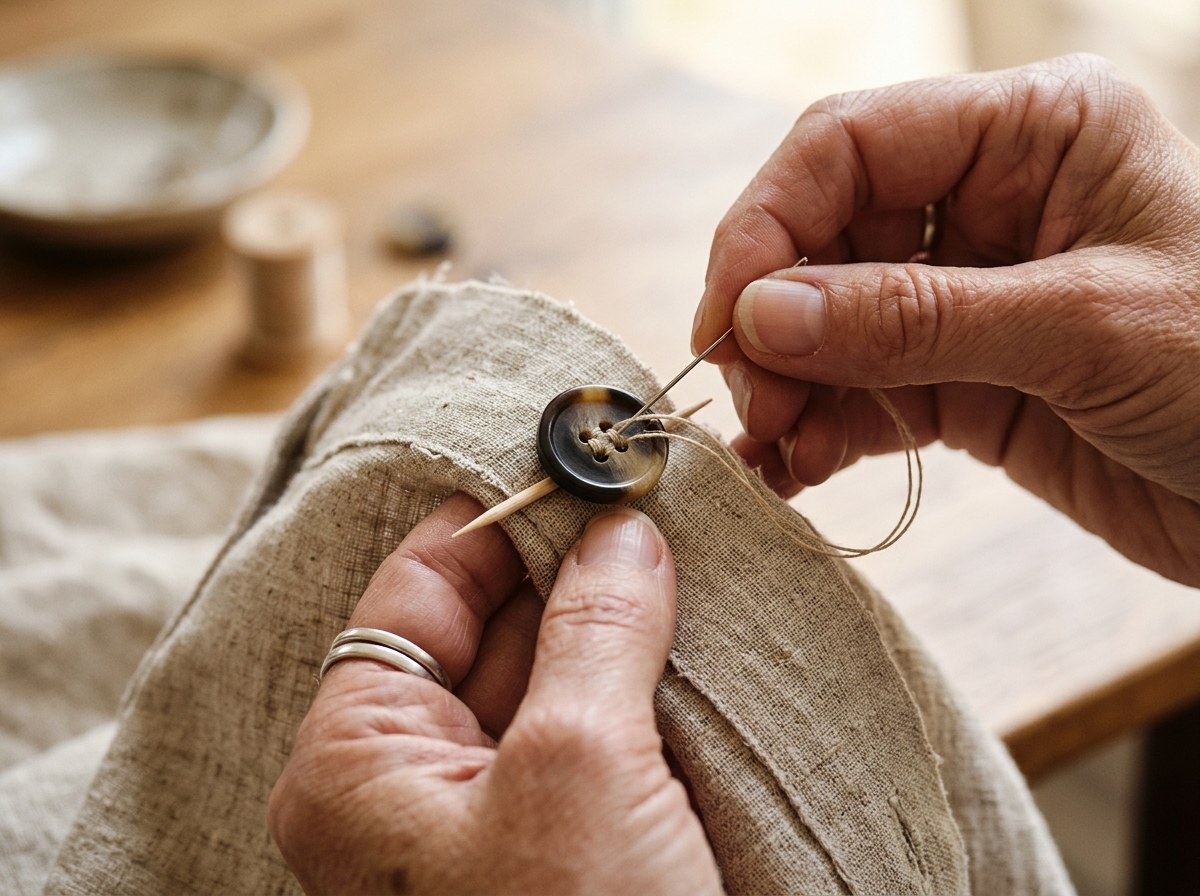
A loose or missing button is among the most frequent clothing repairs, yet it can be permanently resolved with basic hand-sewing supplies. When a button is pulled too tightly flush against the garment, there is no clearance for the buttonhole fabric to slide underneath. This creates persistent tension on the stitching, distorts the garment placket, and causes the threads to wear through prematurely.
In this tutorial, you will learn how to evaluate button types (two-hole flat, four-hole flat, and self-shank), determine whether a thread shank is necessary based on your fabric thickness, and execute a durable lockstitch finish on the garment underside without relying on messy adhesives.
Materials Required
- Replacement button: Selected to match the diameter, style, and hole configuration of surrounding garment buttons.
- Sewing thread: All-purpose polyester thread for general garments, or heavy-duty topstitching thread for winter coats and denim.
- Temporary spacer (pin, toothpick, or matchstick): Used under flat buttons to create thread clearance. Use a sewing pin for thin shirting; use a wooden toothpick or matchstick for medium-to-heavy wools.
- Backing button or fabric patch (optional): Recommended if the original button pulled a hole through the fabric, or on heavy outerwear to distribute strain on the inside.
Tools Needed
- Hand sewing needle: Size 7 or 8 sharp needle with an eye that comfortably accepts doubled thread without shredding fibers.
- Thread snips or fabric shears: Sharp cutting tool for clean thread ends.
- Tailor's chalk or water-soluble marker: For marking the button alignment point accurately.
Step-by-Step Instructions
Anchor the Thread Securely on the Garment
Take a tiny bite of fabric (about 1/16 inch) on the right side of the garment directly over your chalk mark. Pull until the knot reaches the cloth, then take a second small locking stitch across the same point. The button body will completely conceal this knot once mounted.
Position the Button and Insert the Temporary Spacer
Bring the needle up from underneath through one hole of the button. Place your temporary spacer (a sewing pin for lightweight shirts, or a wooden toothpick for medium-to-heavy fabrics) across the center of the button. If using a button with a built-in shank (a raised metal or plastic loop on the back), omit the spacer entirely because the shank already provides the needed clearance.
Stitch Through the Button Holes
Bring your needle down through the opposing hole and push through to the wrong side of the fabric. Pull until the thread rests snug over the spacer without bending it. For a two-hole button, repeat this path 5 to 7 times. For a four-hole button, sew either parallel bars or an "X" pattern, passing 4 to 5 times through each pair of holes. Note that stitch count should correspond to your thread weight: heavy-duty thread requires fewer passes (3 to 4), while standard lightweight thread benefits from 6 to 7 passes.
Remove the Spacer and Expose the Thread Stems
Slide the temporary spacer out from under the thread passes. Bring your needle up through the fabric from the back, but emerge directly underneath the button rather than through any button hole. Gently draw the button upward away from the garment so the thread passes form a distinct slack column.
Wind the Protective Thread Shank
Hold the button upright and wrap your working thread tightly around the vertical thread column 4 to 6 times. This spiral wrapping compresses the loose threads into a solid, reinforced stem (the thread shank) that protects the core fibers against abrasion as the button enters and exits the buttonhole.
Lock the Stitch on the Underside
Pass the needle through the base of the shank directly into the garment fabric to the reverse side. On the underside, take a small stitch right at the base of the seam. Before drawing the loop completely closed, pass your needle through the loop twice to create a double hitch knot. Draw the knot tight against the cloth, repeat once more for security, and trim the thread leaving a 1/8-inch tail.
Common Mistakes & Solutions
Sewing flat buttons flush against thick fabrics without a shank
Why it happens: The overlapping buttonhole layer forces the button to tilt, straining the thread and causing fabric distortion.
Correction: Use a pin or toothpick under the button during stitching to guarantee adequate thread clearance.
Using thread strands longer than 24 inches
Why it happens: Excessive thread twists, forms bird's nests, and weakens from repetitive friction through eyelets.
Correction: Work with manageable lengths of roughly 20 inches and double the strand for strength.
Relying on clear craft glue to secure knot ends
Why it happens: Adhesives can dissolve in wash cycles or dry into hard, scratchy lumps that irritate the wearer.
Correction: Tie two consecutive locking hitch knots through a tiny bite of fabric on the garment underside.
Frequently Asked Questions
When is a thread shank necessary, and when should a button be sewn flat?
A thread shank is necessary whenever the overlapping buttonhole layer has measurable thickness (such as cotton shirts, denim jackets, or wool coats). The shank provides vertical room for the fabric to rest flat under the button. Very thin sheer fabrics or non-functional decorative buttons can be sewn relatively flat with minimal clearance.
What is a backing button, and when should I use one?
A backing button is a small, flat two-hole button sewn directly on the inside of the garment at the same spot as the main exterior button. The stitches pass through both buttons simultaneously. This distributes pulling force across a wider area and is commonly used on heavy winter coats, tailored blazers, or garments where the fabric has thinned.
Which thread is best for sewing buttons on everyday garments?
Doubled all-purpose polyester or cotton-wrapped polyester thread is ideal for shirts, dresses, and light jackets. For heavy denim or winter outerwear, use specialized buttonhole twist or heavy-duty topstitching thread.