How to Repair a Small Hole in a T-Shirt
A detailed guide to stabilizing and repairing small holes in single jersey knitwear using flexible backing, loop-catching techniques, and tension control.
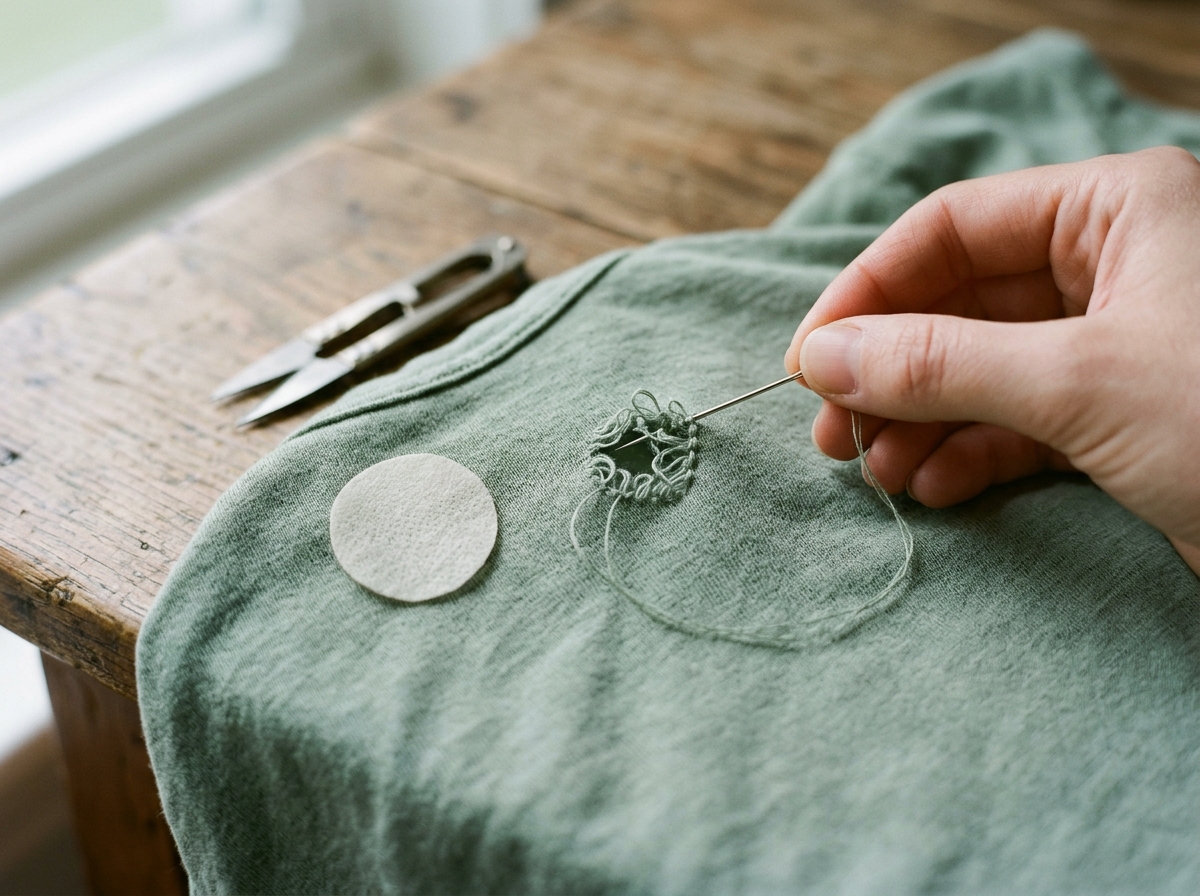
Small pinholes in t-shirts are a common frustration. Unlike woven textiles (such as Oxford shirts or denim) where threads cross in a rigid grid, t-shirt fabric is knitted from continuous interlocking yarn loops (single jersey). When a single loop is severed by friction against belt buckles, zipper teeth, or rough surfaces, the tension in the knit causes adjacent loops to unhook and run.
Repairing knitwear requires a technique that respects the fabric's natural stretch. Pulling opposite sides of a hole tightly together with stiff thread will produce an unsightly puckered ridge. In this tutorial, you will learn how to assess the damage, stabilize open loops with flexible knit interfacing, and execute a discreet closure that moves naturally with the garment.
Materials Required
- Matching polyester sewing thread: A close color match is essential. Choose a shade slightly darker than the garment if an exact match is unavailable, as darker threads visually recede.
- Fusible knit interfacing (stretch/weft): Must be lightweight knit interfacing that stretches laterally. Avoid stiff woven interfacing or heavy craft fusible webs.
- Pressing cloth: A clean cotton cloth or parchment sheet to protect delicate jersey knit from iron shine.
Tools Needed
- Fine hand sewing needle: Size 9 or 10 embroidery sharp or crewel needle. A slender needle avoids expanding delicate knit holes.
- Household steam iron: Set to the recommended temperature for the fabric blend (usually medium for cotton, low for synthetics).
- Fine thread snips: For trimming loose frayed fiber ends flush with the knit.
Step-by-Step Instructions
Assess the Hole and Stabilize the Backing
For pinholes between 1 mm and 5 mm, a flexible backing prevents future unraveling. Cut an oval or circular piece of lightweight fusible knit interfacing roughly 1/2 inch larger than the damaged spot. Rounding the corners is essential: square corners tend to lift and peel during machine washing.
Fuse the Stabilizer on the Reverse Side
On the inside of the shirt, gently coax the raw edges of the hole toward the center with your fingers until they rest flat. Place the fusible interfacing (adhesive dot side down) over the hole. Cover with a damp pressing cloth and press straight down with your iron for 8 to 10 seconds according to the interfacing manufacturer's instructions. Do not slide the iron back and forth, as sliding distorts the knit.
Capture Open Knit Loops on the Right Side
Turn the t-shirt right side out. Thread your fine needle with a single strand of matched thread (about 18 inches) and anchor it into the backing from behind. With the needle tip, carefully catch each open loop of the knit around the perimeter of the hole.
Draw the Perimeter Inward with Neutral Tension
Gently draw the thread until the perimeter loops meet in the center. Support the fabric flat against your worktable with your fingers as you pull. The goal is to bring the edges into contact, not to bunch or overlap them.
Secure with Micro-Stitches on the Reverse Side
Pass the needle to the wrong side of the garment. Take two microscopic backstitches through the interfacing backing to anchor the thread. Pass the needle through the thread loop to form a locking knot, then snip the tail to 1/8 inch.
Final Steam Press and Inspection
Place a dry pressing cloth over the right side of the repair and apply a quick burst of steam with your iron. Steam allows the natural cotton fibers to swell slightly, blending the mended area into the surrounding knit texture.
Common Mistakes & Solutions
Pulling the thread too tight across the opening
Why it happens: Creates a visible dimple or hard cone on the front of the shirt that stands out more than the original hole.
Correction: Maintain light, elastic tension and support the repair flat on a table while pulling the thread.
Using stiff woven interfacing or heavy fusible web
Why it happens: The repaired section becomes rigid like cardboard and will crack or tear away from the flexible knit in the wash.
Correction: Use exclusively knit or stretch interfacing designed for flexible garments.
Sliding the iron over the knit during fusing
Why it happens: Stretches the hot jersey fibers out of shape, creating permanent ripples.
Correction: Press straight down, hold for 8 to 10 seconds, then lift straight up.
Frequently Asked Questions
Why do tiny holes frequently develop near the lower front hem of t-shirts?
This area experiences concentrated daily friction where the shirt rubs repeatedly between metal hardware (jeans buttons, zippers, belt buckles) and hard surfaces like desks or car seatbelts. Catching these pinholes early stops them from expanding.
Can I repair a t-shirt hole without any sewing?
For microscopic pinholes under 1 mm, applying a small circle of lightweight fusible knit interfacing to the inside can temporarily hold the fibers together. However, adding several hand-catching stitches ensures the repair survives multiple machine washings.
When is a visible mend or patch better than fine hand-closing?
If the hole is larger than 6 to 8 mm (1/4 inch), attempting to draw the raw edges together will severely distort the garment. In those cases, a decorative embroidered motif (such as a small leaf or star) or an applied patch provides a cleaner and more durable solution.